


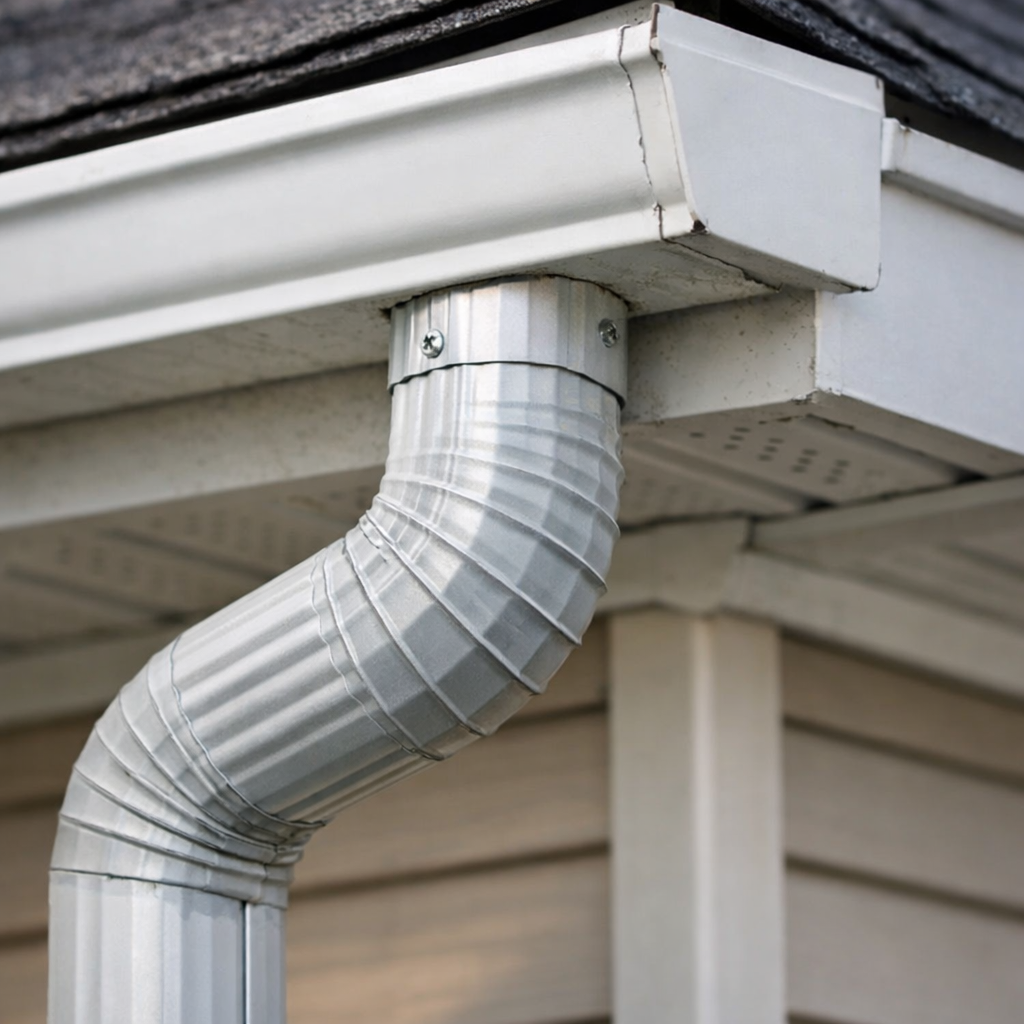
Attaching a downspout to an eavestrough is an important part of protecting your home from rainwater damage. A properly installed downspout collects water from your roof’s eavestrough system and directs it safely toward the ground, helping prevent water from pooling around your foundation.
Whether you’re replacing an existing downspout or installing a new one, the connection needs to be secure, watertight, and positioned to support proper drainage.
For homeowners in Toronto and across the GTA, proper downspout installation is particularly important because heavy rainfall, snow accumulation, and seasonal freeze-thaw cycles can put additional stress on exterior drainage systems.
In this guide, we’ll explain how to attach a downspout to an eavestrough, which tools and materials you’ll need, and how to make sure rainwater drains safely away from your home.
What Is a Downspout and Why Is It Important?
A downspout is the vertical pipe connected to an eavestrough that carries rainwater from the roofline down toward the ground.
Eavestroughs collect rainwater as it runs off your roof, while downspouts transport that water away from your home’s exterior walls and foundation.
Without a properly connected and functioning downspout, rainwater can overflow or discharge too close to your home. Over time, this can contribute to:
- Water pooling around the foundation
- Basement moisture and water infiltration
- Soil erosion around the property
- Damage to landscaping and exterior surfaces
- Premature deterioration of exterior building materials
A complete eavestrough and downspout system helps manage roof runoff and protect your property from unnecessary water damage.
Tools and Materials Needed to Install a Downspout
Before starting the installation, gather the necessary tools and materials. Having everything ready will make the process easier and help ensure a secure connection.
Tools
- Measuring tape
- Tin snips or a suitable metal-cutting tool
- Drill and screwdriver
- Metal file for smoothing sharp edges
- Ladder with a stable base
- Work gloves
- Safety glasses
Materials
- Downspout sections in the appropriate size
- Eavestrough drop outlet
- Downspout elbows
- Downspout brackets or straps
- Sheet metal screws or compatible rivets
- Exterior-grade gutter sealant
- Downspout extension
- Splash block, if needed
The required downspout size, number of elbows, and fastening method depend on your existing eavestrough system, roof drainage requirements, and the layout of your property.
How to Attach a Downspout to an Eavestrough: Step-by-Step
Installing a downspout involves creating an outlet in the eavestrough, connecting the appropriate fittings, securing the vertical pipe, and directing the water toward a suitable drainage area.
Step 1: Choose the Right Location
Start by determining where the downspout should be installed.
Downspouts are commonly positioned near the corners of a home or at other strategic points along the roofline where water can be collected and discharged safely.
Consider the following:
- Choose a location that provides a direct drainage path toward the ground.
- Avoid placing the downspout where it could obstruct doors, windows, or walkways.
- Check that the discharge point will not direct water toward your foundation or neighbouring property.
- Make sure the location allows the downspout to be securely fastened to the exterior wall.
The placement should also account for the total roof area and the capacity of the eavestrough system.
Step 2: Measure and Cut the Eavestrough Opening
Once you’ve selected the installation location, measure the drop outlet and mark its opening on the bottom of the eavestrough.
Use the outlet as a template to trace the correct opening size.
Carefully cut along the marked outline using tin snips or another suitable cutting tool. Remove any metal burrs and smooth the edges with a metal file.
Make sure the opening is large enough for the drop outlet to fit properly without leaving unnecessary gaps.
Step 3: Install the Drop Outlet
The drop outlet connects the eavestrough to the downspout and provides a passage for rainwater to enter the vertical pipe.
Position the outlet over the opening you created and check that it fits securely.
Depending on the outlet design:
- Apply compatible exterior-grade gutter sealant around the connection if required by the manufacturer’s instructions.
- Position the outlet over the opening.
- Secure it using the recommended fasteners.
- Remove excess sealant and allow it to cure according to the manufacturer’s instructions.
A properly installed outlet helps prevent leaks at the connection between the eavestrough and downspout.
Step 4: Connect the Downspout Elbows
Downspout elbows allow the pipe to change direction between the eavestrough outlet and the exterior wall.
Attach the first elbow to the drop outlet, positioning it toward the wall where the vertical downspout will be installed.
Depending on the distance between the eavestrough and the wall, you may need a second elbow and a short connecting section to create an offset.
This arrangement is commonly called an S-curve.
Check that the elbows fit securely and that water can flow through the connection without unnecessary restrictions.
Step 5: Measure and Install the Vertical Downspout
Measure the distance between the upper elbow and the lower section of the downspout.
Account for the insertion depth of the elbows and connecting sections before cutting the downspout to size.
Use tin snips or an appropriate cutting tool to trim the pipe. Smooth any sharp edges before assembling the sections.
Connect the vertical sections using compatible sheet metal screws or rivets, following the manufacturer’s installation recommendations.
Make sure the joints are properly aligned and that the downspout maintains a consistent vertical position.
Step 6: Secure the Downspout to the Exterior Wall
Once the downspout is assembled, attach it to the exterior wall using suitable downspout brackets or straps.
Position the brackets at appropriate intervals based on the manufacturer’s specifications and the height and exposure of the installation.
Fasten each bracket securely without crushing or deforming the downspout.
The pipe should remain straight, stable, and properly supported, including around elbow connections and other transition points.
Step 7: Install the Bottom Elbow and Downspout Extension
The final step is to direct water away from your home’s foundation.
Attach a bottom elbow to the vertical downspout and connect an extension if additional drainage distance is needed.
Canadian government guidance recommends directing downspout discharge toward an area with good drainage, approximately 2 metres away from the foundation where possible.
The extension should:
- Direct water away from the foundation.
- Avoid discharging onto neighbouring properties.
- Prevent water from pooling near walkways and driveways.
- Avoid creating slippery or icy surfaces during colder months.
A splash block can also help distribute the water and reduce soil erosion at the discharge point.
Step 8: Test the Downspout Connection
Before considering the installation complete, check that all connections are secure.
Run water through the eavestrough system using a garden hose and observe how it travels through the downspout.
Check for:
- Leaks around the drop outlet.
- Loose connections between pipe sections.
- Water escaping around elbow joints.
- Movement or instability in the mounting brackets.
- Water pooling around the foundation or at the discharge point.
Make any necessary adjustments to ensure that the system drains properly.
Common Downspout Installation Mistakes to Avoid
Even a relatively straightforward installation can cause drainage problems if certain details are overlooked.
Here are some common mistakes to avoid.
Incorrect Downspout Placement
Installing a downspout in an unsuitable location can make drainage less effective. Always consider the direction of water flow and the location of the final discharge point.
Loose or Poorly Sealed Connections
Improperly fitted outlets and pipe joints can leak during heavy rainfall. Make sure all connections are secure and use compatible sealants where required.
Inadequate Support
Downspouts that are not properly secured can shift, separate, or become damaged during strong winds and winter weather.
Directing Water Too Close to the Foundation
One of the most important considerations is where the water goes after leaving the downspout. Discharging water too close to the foundation can contribute to soil saturation and basement moisture problems.
Ignoring Existing Eavestrough Problems
A new downspout will not solve problems caused by clogged, sagging, or improperly sloped eavestroughs. Inspect the entire system before completing the installation.
Toronto Downspout Installation Requirements and Drainage Considerations
Homeowners in Toronto should also be aware of local drainage requirements when installing or modifying downspouts.
The Ontario Building Code addresses downspout drainage in Article 9.26.18.2. Where downspouts are provided and are not connected to a sewer, extensions must carry rainwater away from the building in a manner that prevents soil erosion.
Toronto’s Property Standards By-law, Chapter 629, Section 629-4.3, also addresses roof drainage. It requires roof drainage to flow through eavestroughs or gutters into downspouts that discharge away from buildings, subject to the provisions outlined in the by-law.
Toronto also has a mandatory downspout disconnection program. Property owners must ensure their downspouts are disconnected from the City’s sewer system, subject to applicable exemptions.
When disconnecting a downspout, make sure that rainwater is directed onto a suitable area of your property without creating drainage problems for neighbouring properties or public walkways.
For additional information, consult the City of Toronto’s downspout disconnection requirements.
When Should You Replace or Repair a Downspout?
Downspouts are exposed to changing weather conditions throughout the year. Over time, fasteners can loosen, joints can separate, and metal components can deteriorate.
Consider repairing or replacing a downspout if you notice:
- Visible cracks, holes, or corrosion.
- Leaking connections or separated joints.
- Loose brackets or sections pulling away from the wall.
- Repeated blockages or restricted water flow.
- Water overflowing during heavy rainfall.
- Damage caused by ice, snow, or physical impact.
If the damage extends to the eavestroughs, fascia, or soffit, it may be more effective to have the entire drainage system inspected.
Should You Install a Downspout Yourself or Hire a Professional?
Installing a downspout may be manageable for homeowners with the right tools and experience. However, the project can become more complicated when working at significant heights, modifying existing eavestroughs, or dealing with drainage issues.
Consider hiring a professional if:
- The installation requires working near the roofline at significant heights.
- Existing eavestroughs are sagging or damaged.
- The fascia board requires repairs.
- Multiple downspouts need to be installed or relocated.
- Water drainage problems are affecting your foundation or landscaping.
- You are unsure about local drainage requirements.
Professional installation can help ensure that the eavestrough and downspout system is properly sized, securely connected, and positioned to manage rainwater effectively.
Professional Eavestrough and Downspout Services in Toronto
A properly functioning eavestrough and downspout system is essential for protecting your home against rainwater damage.
If your downspout needs to be replaced, your eavestroughs require repairs, or you’re planning a complete drainage system upgrade, Branova Siding can help.
Branova Siding provides professional eavestrough installation, repair, and cleaning services in Toronto and across the GTA. The team also offers gutter and leaf guard installation to help homeowners maintain effective exterior drainage.
Whether you need a minor repair or a complete eavestrough system replacement, working with an experienced contractor can help prevent drainage issues and protect your home’s exterior.
Contact Branova Siding today to request a free estimate for your eavestrough and downspout project.
Frequently Asked Questions
What size downspout do I need?
Common rectangular downspout sizes include 2 × 3 inches and 3 × 4 inches. The appropriate size depends on the roof area, eavestrough dimensions, expected rainfall, and drainage system design.
How far should a downspout extend from the house?
Canadian government guidance recommends directing downspout discharge approximately 2 metres (6 feet) away from the foundation where possible. The exact extension and discharge location should account for property grading, neighbouring properties, and local drainage requirements.
How often should downspout brackets be installed?
Bracket spacing depends on the downspout manufacturer’s specifications, material, height, and exposure to wind and weather. Follow the installation instructions for your particular system and provide additional support where necessary.
Can you attach a downspout without drilling?
Some downspout systems use connectors and fittings that minimize drilling, but the outlet and mounting brackets generally require appropriate mechanical fastening. Follow the manufacturer’s instructions to ensure a secure installation.
Why is my downspout leaking at the eavestrough connection?
Leaks around the eavestrough connection can result from a poorly fitted drop outlet, damaged sealant, loose fasteners, or an incorrectly sized opening. Inspect the connection and replace damaged components as needed.
Do I need to disconnect my downspout in Toronto?
Toronto requires property owners to disconnect downspouts from the City’s sewer system, subject to applicable exemptions. Before modifying an existing drainage system, review the City’s current requirements and ensure that rainwater can be discharged safely on your property.
When should I hire a professional for downspout installation?
Hire a professional if the installation involves significant roof heights, damaged eavestroughs, deteriorated fascia, multiple downspouts, or complicated drainage conditions. A professional can assess the entire system and recommend an appropriate installation.


